A garage for a man is more than just an auxiliary room. Few people think that the garage belongs to the premises with a high fire hazard. In this regard, both the lamps themselves and the place of their installation put forward special requirements.
In this article, you will find 6 tips for organizing garage lighting, decide which lamps are best for this purpose and why, and also learn a couple of easy ways to organize emergency stand-alone lighting.
General requirements for the lighting system
The process of organizing lighting in a garage is by and large no different from thinking through a light map for a living space. So that you can work comfortably and generally use the space of the garage, one lamp located in the center of the ceiling will not be enough. This is due to simple requirements that are relevant for lighting systems in rooms where there is no source of natural light.
- The light should spread evenly and cover the entire area, leaving no dark, unlit corners;
- The power of the light flux must be sufficient;
- It is best to combine diffused lighting from a ceiling lamp with lighting fixtures with a directional light flux. It is also worth providing at least one portable lamp;
- If there is a working area in the garage, it is necessary to arrange an additional lamp for its full illumination. We are talking about workbenches, racks with tools, etc.;
- At the same time, it is very important that the light does not reflect from the working surface and does not blind the performer;
- To make the lighting more rational, mentally divide the garage space into functional zones. Perhaps it will be much better and more convenient if the main lamp is not alone and is not located in the center of the ceiling, but directly above the hood and trunk of your car. Thus, during parking, you will be able to control the process to the maximum. Yes, and during minor repairs, adding oil and other liquids, it will be much more convenient for you, as well as unloading / unloading things in the trunk;
- If your garage is metal, be sure to provide grounding for the entire circuit;
- Be aware that a garage can store many vehicle fluids that are flammable and flammable. Therefore, lighting must be safe. The wiring itself must be hidden in special corrugations or pipes if it passes outside the wall. A hidden wiring system would be more preferable. But doing this after the garage is fully built can be problematic;
- Light bulbs should be selected for reasons of safety (do not generate a spark during burnout) and economy;
- Local and general lighting must be able to be switched on independently;
- If there is free space in the switchboard, be sure to give it under the sockets. Over time, you will thank yourself for this;
- If you already have several lights in your garage, but still decide to upgrade or add a couple more points, be sure to evaluate the condition of the wiring. Do not skimp on replacing old aluminum wiring with copper. Keep in mind that a wire with a cross section of 1.5 mm is selected for the light point, and 2.5 mm for sockets;
- It will be safer and more economical to use a step-down transformer that is installed on the shield. This will make it possible to use low-power lamps;
- If your lighting system includes a streetlight, be sure to connect a motion sensor to it. Thus, it will be possible to save on electricity consumption.
Which lamp type to choose?
Not all types of lamps are suitable for garage use. Our task is to choose a lamp that will:
- Economical;
- Safe;
- Have protection against moisture and dust;
- Maintain performance under temperature fluctuations.
Most often in the garage you can find these types of lamps:
- Incandescent lamp. Previously, when there were no alternative options, absolutely every garage owner used just such a lamp, which hung alone over the gate in a thick glass flask with a metal grill around. In such a simple way, the lamp was protected from adverse factors and accidental mechanical influences. The only advantage in this case is the cost of the lamp and the ease of installation. But you need to remember that incandescent lamps are less economical compared to the same LEDs and even at higher power they create a less bright, uneven luminous flux. Therefore, today this method has become obsolete;
- An excellent alternative to an incandescent lamp will be energy-saving lamps, or the so-called housekeepers. They have a long service life, are economical, easy to install, remain operational at any temperature and have three glow temperatures – cold, warm, neutral. The last option is the most comfortable for perception by our organs of vision. The disadvantage is their cost;
- A fluorescent lamp is a glass bulb filled with an inert gas, mercury vapor and a phosphor. Such a source is energy efficient and is capable of emitting from 45 lumens per 1 watt of electricity. Often fluorescent lamps are hidden in a protective box made of metal and plastic and, in theory, could be an ideal light source for a garage. But! They are characterized by unstable operation at low temperatures (below + 5 ° C), or rather, the lamp may simply not light up. Therefore, they can only be used in heated rooms. In addition, the light of the lamp will be dim if there are frequent surges in the input voltage. This problem is eliminated by using a stabilizer. And another disadvantage is the presence of mercury vapor inside the lamp. If the lamp is accidentally broken, they will instantly spread into the environment;
- Halogen lamps are not as powerful, they are capable of emitting a luminous flux of 15-22 lumens per watt. Their advantage and at the same time a disadvantage is the operation from a voltage source of 12 volts, which obliges the use of power supplies. Therefore, it is better to use halogens as local illumination of individual zones. Their main disadvantage is the insecurity of the structure from dust, power surges and mechanical stress. And if you accidentally touch the lamp during operation, you can get burned. Therefore, they are placed in a special glass ceiling;
- The best light source, which is very powerful and economical at the same time, is the LED. They also have the highest cost, but it is more than justified. The LED is resistant to mechanical stress. You can use different variations of LED lamps. For example, round LED lights provide a bright, diffused light due to the shape of the ceiling. The LED strip can be used both as a main and as a local lighting. For side lighting, you can use LED lamps, which are shaped like halogen lamps. An excellent alternative would be LED duralight. It not only has a reliable protective shell that protects against moisture and dust penetration, but can also be connected directly to a 220 volt network without any step-down transformers.
So let’s sum it up:
- Combined lighting is more effective;
- In heated rooms, fluorescent lamps can be used in combination with halogen or LED;
- In unheated garages, fluorescent lamps cannot be used. In this case, it is better to choose LEDs or energy-saving lamps;
- If you think that using only diodes is very expensive, then you are mistaken. Yes, it is possible to purchase the fixtures themselves and you will have to spend a larger amount, but during operation due to the low consumption of electricity, their cost will pay off;
- Halogen lamps definitely need additional protection. If this condition is met, they can be used as additional light sources.
How to position lights correctly?
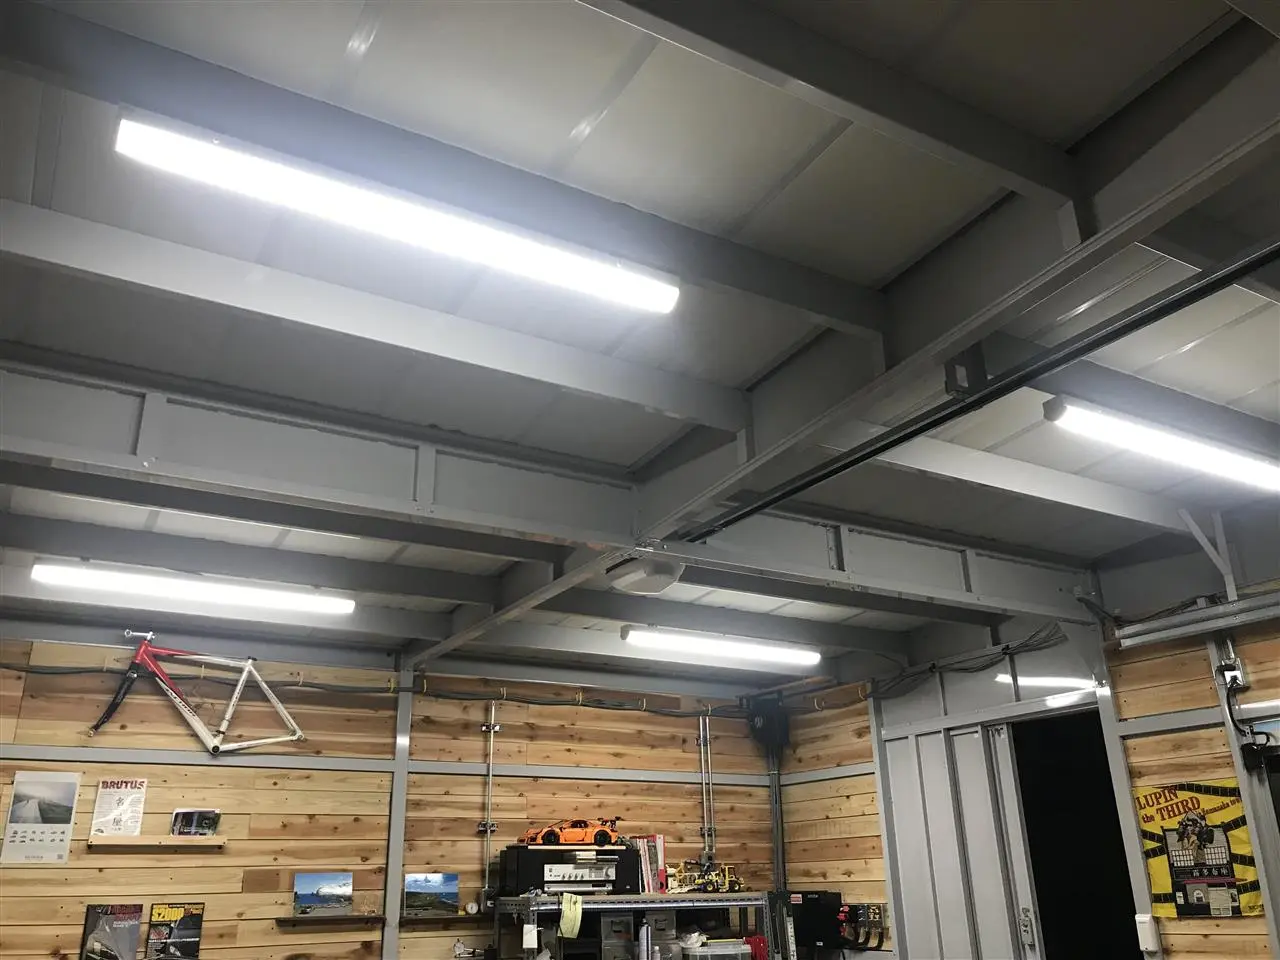
- Ceiling lights in garages with a large area must be installed in two rows at the edges, at a distance of about 50 cm from the walls and 100 cm from each other;
- Garages with high ceilings are additionally equipped with wall lights. They can be both overhead and mortise. They must be placed below eye level so that they do not blind. At a height of approximately 1.5-1.8 meters;
- In small garages, you can completely abandon ceiling lights in favor of wall lights;
Lamps to illuminate the work area should also be located below the eye level of a standing or sitting person. Depending on what kind of work you are doing; - In order to avoid accidental injuries from tools lying on the floor, which can sometimes simply be overlooked, it is recommended to organize lower lighting. It is implemented by LED or halogen lamps located parallel to the floor plane at a height of not more than 0.4 meters. Such lighting is very convenient even if the garage is used exclusively for parking a car. A scheme, supplemented by one common ceiling lamp and one or two portable lamps, will be optimal in this case.
We just gave an example on which surface and at what height it is best to mount the fixtures. However, the general lighting scheme for each garage will be individual. First of all, you need to take into account the purpose of the room and its area.
Calculation of the required amount of light
We have already said that it is best to divide the garage into functional areas and use multi-level lighting. This means that at this stage you should have an approximate layout of the fixtures in the right places. Also, you should have already decided on the type of lamps that you will use.
- First you need to calculate the total power required to fully illuminate the entire area.
- To do this, you need to multiply the generally accepted value of the required luminous flux per 1 m2 (20 watts for incandescent lamps) by the area of \u200b\u200byour garage. Let’s say 20 m2 × 20 watts = 400 watts.
- After that, we will return to the scheme and calculate the number of fixtures that you are going to install.
- For example, you have 1 lamp on the ceiling, one above the desktop, and two lamps on the side walls, total – 6 pcs. Accordingly, the power of 1 light point should not be less than 400/6=67 watts. Further, based on the power of each type of lamp, the lamp itself is selected.
- It is also necessary to take into account the height of the ceiling in the room. If the height is more than 2.5 meters, then the resulting total power must be multiplied by a factor of 1.5. That is, 20m2 × 20 watts \u003d 400 watts × 1.5 \u003d 600 watts.
Please note – the calculation of the required number of lamps to illuminate the viewing hole is made separately. For this, the area of the well is multiplied by 20 watts. And then the resulting value is distributed to the desired number of fixtures.
Tips for lighting the lookout pit
The requirements for the lamps themselves, which will be used to illuminate the viewing hole, will be somewhat different:
- Due to the higher humidity in the pit, the luminaire must have an appropriate level of protection – IP67;
- The pit is a rather narrow space, so touching the lamp is almost inevitable. To avoid burns, you need to choose lamps, the body of which is protected from heat or crammed;
- Given that you are in the pit when you need to repair the car, you need to consider that water or even dirt can drip from its bottom if the car has just driven in. Also, drops of other liquids from the system are not excluded. If it hits the luminaire body, this should not lead to its failure.
Small tips:
- Nobody thinks about it, but the color in which the walls of the viewing hole are painted is of great importance. It is known that dark colors absorb light, while light colors reflect. Therefore, by painting the surface in white or beige shades, you will get much more light. This technique also applies to the entire area of \u200b\u200bthe room. A lighter finish allows the use of lower wattage lamps;
- Pay attention to the LED lamps in the form of rulers, which have an IP67 degree of protection and operate on a 12 V voltage that is safe for humans. Such lamps can be interconnected by adjusting the length. With their help, it is very easy to perform economical contour lighting of the entire pit;
- If a voltage of 220 V is used, an RCD with a trip current of at least 30 mA is required. And the lamps in this case must be used with a degree of protection from 1 to 3 in accordance with clause 6.1.14 of the PUE;
- Another important point – the light from the lamp in the inspection hole should be directed upwards to a greater extent – to the bottom of the car, otherwise what’s the use of it. To ensure this condition, you need to select fixtures with the appropriate shape of the ceiling or install the fixture in wall niches. With this installation method, you can choose LED spotlights that can change the angle of the ceiling and direct the light flux upwards;
- For greater convenience, be sure to provide a portable lamp with a cord of sufficient length, which can be illuminated in case of emergency, while in the pit.
Autonomous lighting options
Autonomous lighting must be provided if there are frequent drops or power outages. Also, autonomous lighting will become indispensable for those whose garages do not have the ability to connect 220 V. In various sources, you can find many ways that are unjustified in terms of costs for your organization. For example:
- Many people suggest installing solar panels on the roof of the garage, but no one takes into account that you need to spend a lot of money on the purchase of the panel itself, plus even more money on storage systems and converters. In addition, vandals who can covet expensive equipment cannot be discarded. This method is justified only if the garage is located in a private protected area, next to a residential building where a similar system has already been installed. But do not forget that in this case there is a dependence on weather conditions;
- Some advise installing a wind generator near the garage. And if the windmill itself can still be built independently, then the equipment that will convert the energy will need to be bought. In this case, there is a complete dependence on the presence of wind. And also one day you can not find your windmill thanks to “well-wishers”;
- Another strange way is to install a so-called “Filipino” lantern in the roof of the garage. This invention is a construction of an ordinary transparent plastic bottle, which is filled with water, covered with a tin plate and a kind of illumination is obtained due to the refraction of sunlight. This is really impressive, but not in the room where the car is stored. Holes in the roof are not acceptable in this case. Especially in winter, when there are very few sunny days, such a lantern will be useless.
Therefore, we can distinguish two, more economical and reasonable ways to organize autonomous lighting:
- In the first case, we need a car battery and a diode tape. It is recommended to use the battery not the one that is installed in the car, but a spare or used one. A diode tape is suitable in this case, as it is able to operate on a voltage of 12 V, which is provided by the battery. It is better not to use a completely dead battery, since it will not provide lighting for more than 5-6 hours;
- Instead of a car battery, you can use a gasoline generator according to the same principle. But in terms of running time, it loses to the previous one. Therefore, it is better not to use it as a permanent autonomous lighting.
Alternatively, you can also use LED bulbs that can be charged. They look like regular housekeepers, but have a hanging hook on the side of the chuck. A fully charged light bulb can shine for several hours. After that, to resume work, you just need to re-charge it.